Vue.js and Firebase Authentication: A Simple Example
I like simple things. Vue.js is a pretty simple Javascript framework. And Firebase Authentication is a pretty simple way of adding authentication to a web app. So, in the spirit of simplicity, let’s put these two simple things together using a very simple example.
Wait, what are we doing?
When you create a new Vue project, you’re welcomed with a beautiful default page like this:
Looks good. It’s made up of a lone default component, aptly named HelloWorld. All we’re going to do is make a few changes to the component so that the lovely welcome message and the details on the page are hidden to an unauthenticated user:
Logging in with a Google account will unhide it all so that you can witness it in all its HelloWorldly glory.
Let’s begin.
Set some things up
The only prerequisite today is that you have Node.js installed on your system.
Vue.js
We’ll need to install npm install Vue globally:
npm install -g @vue/cliNext we’ll create a Vue project. Easy peasy:
vue create nicevueFor the command above, keep the default options they provide you.
As the Vue CLI will suggest, jump into your newly created project directory (cd nicevue) and then run:
npm run serveThe default welcome page should be waiting for you on localhost:8080:
That was easy.
Firebase
To get started with Firebase, we’ll need to install the firebase-tools package on your system with npm. Firebase Tools is the Firebase CLI that lets you do all the Firebase things (create projects, deploy apps, manage databases, etc).
Let’s install:
npm install -g firebase-toolsAnd now, we’ll install the Firebase SDK to our Vue project so that it’ll be able to hook up to our Firebase backend. Run this from the project root directory:
npm install firebaseFirebase is going to want to know who you are. Tell it by logging in:
firebase loginNow, the next few steps can be accomplished via the Firebase Console but let’s stick with the command line for now. We’ll have to create a project, which is the top-level entity for Firebase, and essentially a Google Cloud Project. Here’s how we’ll create a new project:
firebase projects:createGive your project a snazzy id and name. It’ll spit out an error if your id isn’t globally unique so feel free to be creative.
Now we’ll need to create an app in our project:
firebase apps:create --project <your-snazzy-and-unique-project-id>When prompted, select Web from the provided platform choices and call it whatever you’d like. Maybe stick with what we used when we created our Vue app.
A few more Firebase things
So we’ve got a project and an app, let’s tweak a few settings. In a new browser window, head to the Firebase Console, find your project and click it.
Then, on the Project Overview page find the settings cog on the top left next to Project Overview and hit Project Settings:
Here, you’ll have to set the GCP resource location — click the pencil and pick one:
Before you leave this page, look a little lower in the Your apps box. Under Firebase SDK snippet, select Config to get a code snippet. Copy it to clipboard or paste it somewhere in the meantime; we’ll need it a little later. It looks like this:
const firebaseConfig = {
    apiKey: <YOUR API KEY>,
    authDomain: <YOUR AUTH DOMAIN>,
    databaseURL: <YOUR DATABASE URL>,
    projectId: <YOUR PROJECT ID>,
    storageBucket: <YOUR APP STORAGE BUCKET>,
    messagingSenderId: <YOUR MESSAGING SENDER ID>,
    appId: <YOUR APP ID>
};
Next, you have to enable Google as a sign-in method. Click Authentication from the Develop pane on the left and go to the Sign-in method tab. There are quite a few choices, but for now, click Google, and toggle Enable. Select a project support email and click Save. All done here.
Ready to roll
Take a look at your project’s directory. We’re only going to care about the Helloworld.vue file located in the src/components/ directory and a new blank file we’ll create in the src/ directory that we’ll name firebase.js.
Let’s get the party started there.
firebase.js
In the src directory create firebase.js and start off with some imports:
import * as firebase from 'firebase/app';
import 'firebase/auth';
Then we’re going to add our app’s Firebase configuration object. Remember that block I told you to copy to your clipboard? Yep, we’ll need that now. Add that below your import lines followed by the initializeApp function call:
...
const firebaseConfig = {
    apiKey: <YOUR API KEY>,
    authDomain: <YOUR AUTH DOMAIN>,
    databaseURL: <YOUR DATABASE URL>,
    projectId: <YOUR PROJECT ID>,
    storageBucket: <YOUR APP STORAGE BUCKET>,
    messagingSenderId: <YOUR MESSAGING SENDER ID>,
    appId: <YOUR APP ID>
};firebase.initializeApp(firebaseConfig);
And finally let’s export some stuff that we’ll want to use in our component:
- the firebase auth function
- a function to login
- a function to logout
export default {
    auth: firebase.auth(),
    login() {
      const provider = new firebase.auth.GoogleAuthProvider();
      firebase.auth().signInWithPopup(provider)
      .then(function(result) {
        console.log(result);
      })
      .catch(function(error){
        const errorCode = error.code;
        const errorMessage = error.message;
        const email = error.email;
        const credential = error.credential;
        console.log(errorCode, errorMessage, email, credential);
        })
    },
    logout() {
      firebase.auth().signOut()
      .then(function() {})
      .catch(function(error) {
        console.log(error)});
    }
}
And that’s it for firebase.js. Onward to the component.
HelloWorld.vue
Out of the box, Vue provides us with a HelloWorld module that gives us that default landing page. Scroll up to the top of the file so we can make a few changes to the template part of our component. We need a login button and a logout button that will kickoff our login and logout functions. We’ll start with the login button at the top of our ‘hello’ div:
<template>
<div class="hello">
<button v-if="!authenticated" @click="login">Login</button>
...
As you can see, our button’s visibility is based on a property we’ll create later called ‘authenticated.’ And naturally, the action we’ll want to use on our button will be @click to login.
For the purpose of this exercise, we want to wrap everything below the Login button in a div with a v-if. We’ll attach that to the authenticated property so that the content will only show when a user is logged in. Add the open div tag right after the login button along with a logout button. We’ll also toss in a personalized line right above the <h1> tags. Oh, and don’t forget to add a closing </div> at the end of the block:
...
<div class="hello">
<button v-if="!authenticated" @click="login">Login</button>
<div v-if="authenticated">
<button @click="logout">Logout</button>
<h1>Hi {{ firstName }}!</h1>
<h1>{{ msg }}</h1>
...
...
</ul>
</div>
</div>
</template>
...
At this point, run npm run serve to see what we’ve got going. Here’s what you should have:
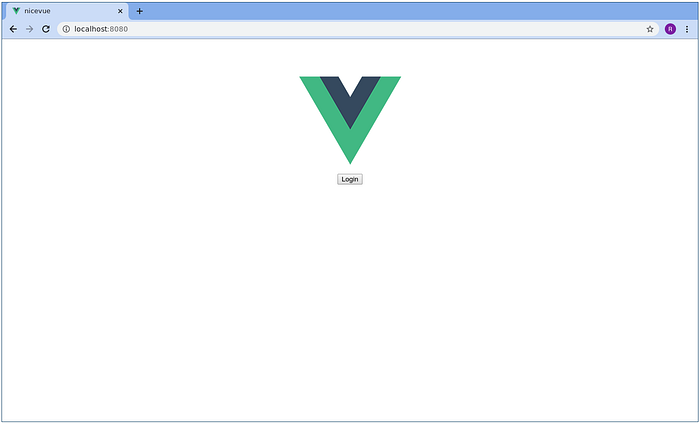
Click the Login button as many times as you’d like; nothing will happen.
Let’s scroll on down to the <script> block. First thing’s first, let’s make sure we import that firebase.js file. Add the import inside the <script> tag:
<script>
import Firebase from '../firebase.js';
...
Below that you’ll see there’s already a little export block but it doesn’t have much going on. We’ll add a few things, starting with a data() function. For this example, have it return one thing: a user object that has an empty data object and loggedIn status with a false boolean value:
export default {
    name: 'HelloWorld',
    props: {
    msg: String
    },
    data () {
      return {
        user: {
          loggedIn: false,
          data: {}
        }
      }
    },
...
Next up, let’s add a couple of computed properties:
- an
authenticatedproperty based on theloggedInproperty in our user object - a
firstNameproperty based on the user object’sdisplayNameproperty. With Google auth, the display name is often the user’s full name, so we’ll chop it up and use just the first half:
...
    computed: {
        authenticated(){
          return this.user.loggedIn
        },
        firstName(){
          if (this.user.data.displayName) {
            return this.user.data.displayName.split(' ')[0]
          }
          return null
        }
    },
...
Maybe most important of all, we’ll need some methods to log in and out. They’re just going to call our firebase login and logout functions from before:
...
    methods: {
      login() {
        Firebase.login();
      },
      logout() {
        Firebase.logout()
      }
    },
...
You might’ve noticed that our login and logout functions don’t update our user data. You could make each of them do that but if we want our user session to survive a refresh and persist across multiple windows, we’ll need a way to get that authentication data as soon as our component loads. The key here is Firebase’s onAuthStateChanged() function. Let’s throw that into our component’s mounted lifecycle hook:
mounted: function() {
      Firebase.auth.onAuthStateChanged( user => {
        if (user) {
          this.user.loggedIn = true;
          this.user.data = user;
        }
        else {
          this.user.loggedIn = false;
          this.user.data = {};
        }
      })
    }
}
This means that as soon as the component is mounted, our user object will reflect Firebase’s user authentication state. Cool.
Let it rip
Now let’s run this puppy and see what we’ve got. If you haven’t already, run npm run serve load up localhost:8080:
Very nice. Moment of truth: click that login! You’ll get a standard Google authentication popup window where you can login with your gmail account. Once you’re in, voila!
And there it is. This is the simplest implementation of Firebase Authentication in Vue.js.